The OBS Studio is one of the best free screen recording softwares for the Windows and Mac that offers you a wide range of options for Windows and Mac Screen Recordings. You can easily integrate the program for the popular video streaming sites. If you are a professional gamer, OBS Studio is the best screen recording software to create gameplay videos. Take note that this screen recording software is not for the novice. If you are a newbie, you will need a lot of time and patience to use the OBS Studio properly.
The Pros of OBS Studio Screen Recording Software
- Best Free Windows & Mac Screen Recording Software
- Offers A Wide Range of Screen Recording Options
- Best Screen Recording Software for Gamers
- Best Screen Recording Software for Video Streaming
The Cons of OBS Studio Screen Recording Software
- High Learning Curve for the Novices
The USP of OBS Studio Screen Recording Software
- Free Gameplay Recording & Streaming
The OBS Studio is the best free screen recording software for the professional Windows and Mac Screen Recording and Streaming. The program is well-designed to offer you the numerous advanced screen recording features and functionalities. To use the OBS Studio Windows and Mac Screen Recording Software, you need to download the OBS Studio Installer on your computer. The OBS Studio Installer comes with an auto-configuration wizard to help you with the technical settings like the screen recording resolution and frame rate. The program offers you a variety of screen recording options ranging from a specific program window to recording your entire computer screen. You can also use the OBS Studio to record the full-screen video sources like the games, record directly from your webcam or other video source or just record only the audio.
The OBS Studio also allows you to combine multiple content sources together to create a picture-in-picture effect. The program is perfect for combining a video tutorial or a game stream with a webcam video. You can combine as many content sources as you want.
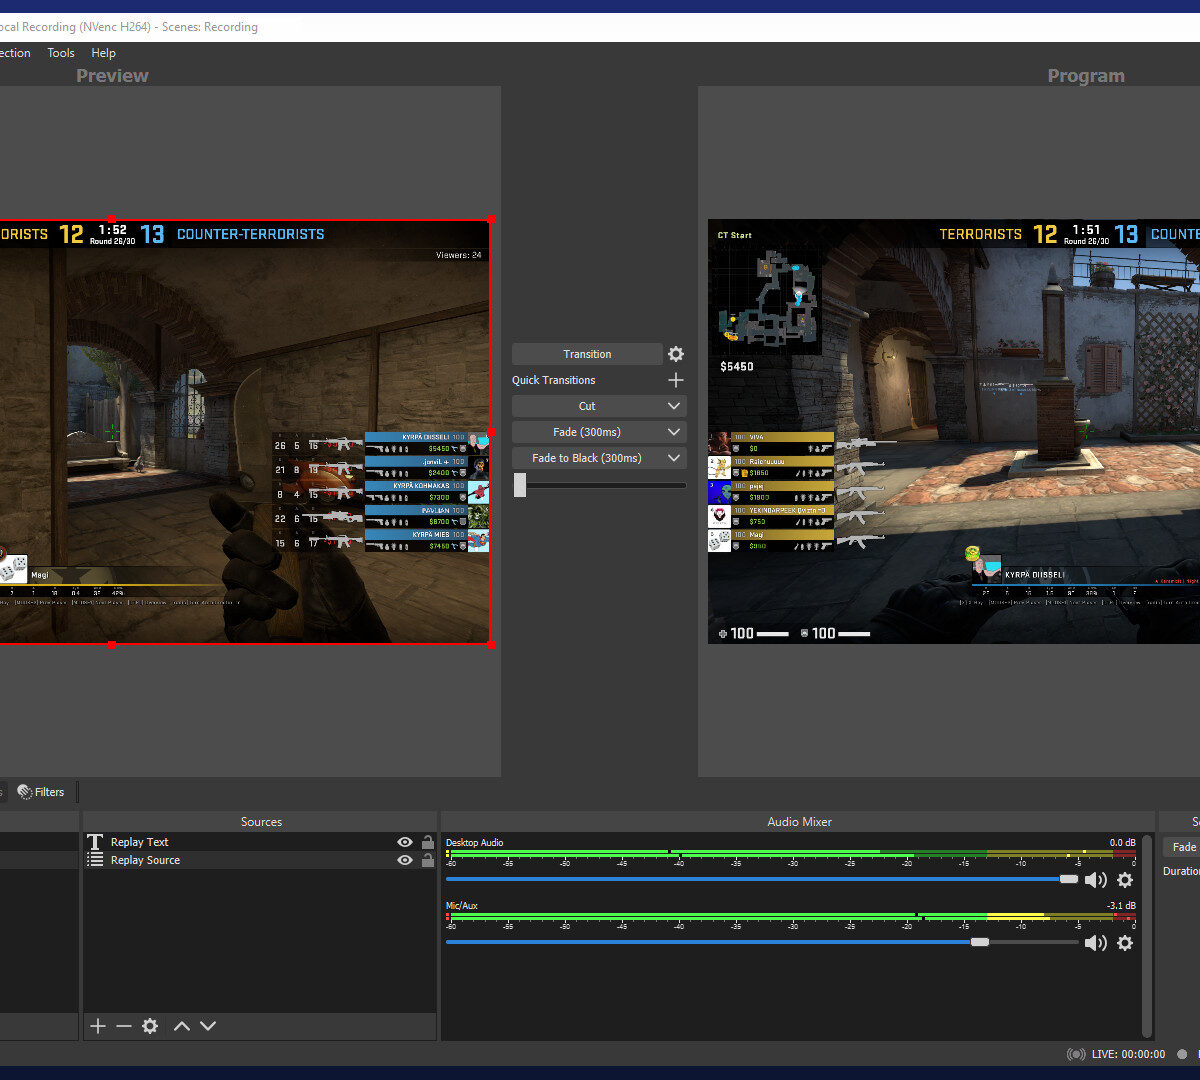
If you want to create a complex screen recording, the OBS Studio allows you to create the ‘Scenes’. The process of setting up the ‘Scenes’ is similar to the process of setting up a source, however, you need to make sure that you are in the ‘Studio’ mode that displays two scenes side by side so that you can ensure the smooth transitions.
To start and stop the Windows and Mac Screen Recording in the OBS Studio, you need to configure the hotkeys for the purpose.
A Deep Dive into the OBS Studio Screen Recording Software
The OBS Studio is the best free screen recording software for Windows and Mac Screen Recording. You can record your video tutorial or gameplay and stream it to platforms like Twitch and YouTube. The program can be also used for creating the screen casts but it is not recommended for those who need a quick and easy gameplay screen recording. While using the OBS Studio for the Windows and Mac Screen Recordings, you will notice that there are lots of features and settings which require a considerable amount of time, effort and patience for proper execution. However, to ease your learning process, the OBS Studio offers you the auto-configuration wizard so that you can optimize your setup for screen recording and streaming while using the program for the first time.
The program works best in the multi-screen setup mode as you can see the OBS on one display and play your game on the other.
Take note that the OBS Studio does not have the in-game overlay. It will work in the background. So you first need to start the recording and streaming after running the game. To make the best use of the OBS Studio, you should first record your gameplay and then create a YouTube Playthrough Tutorial. The program also allows you to add any number of items to your screen recording and streaming.
For example, the picture-in-picture webcam shot, personalized watermark etc. To create a screen recording video, you first need to create a ‘Scene’. Then, you need to add your screen recording content sources like your webcam, microphone, watermark etc.
After setting up your content sources for the recording, you need to hit the ‘Start Recording’ button. When your content sources are recorded, you need to hit the ‘Stop Recording’ button.
Before recording your first content source, make sure that the program is configured properly and working before you use it for a full gameplay recording session.
Though the OBS Studio comes with numerous configurations, you can make the screen recording process a little bit easier by paying attention to the output settings of your recording under the Settings>Output>Recording. Here, you can choose you preferred video encoder, the recording format and the recording video quality.
While the program uses hardware encoding, it is a little bit complex and you should rather choose the software encoding (x264) option.
You should also pay attention to your video resolution settings under the Settings>Video. You should setup the ‘Base (Canvas) Resolution’ to your preferred resolution of your game recording video because if you are using a 1080p computer screen and the quality of your gameplay recording or streaming video becomes poor at 1080p and you decide to drop down to 720p, the canvas resolution setting of 1080p won’t record the game at your preferred resolution of 1080p. Thus, you won’t get a full screen recording of your gameplay and the recorded gameplay video will appear in the upper-left corner of the 1080p window.
Apart from these settings, you should also pay attention to the default hotkey settings of the OBS Studio. Before using the program, you must first configure the default hotkey settings to quickly start and stop your Windows and Mac Screen Recording.
The Final Verdict
Though the OBS Studio is the best free screen recording software for the Windows and Mac, its wide range of features, functionalities and configuration settings require a considerable amount of time and effort to work properly. This program is highly-recommended for advanced users. If you are a novice user, you must have the patience to learn how to use the OBS Studio properly before you actually start using it for your computer screen recording.
Take note that learning how to use the OBS Studio for Windows and Mac Screen Recording and Streaming is worth all your time, efforts and patience, if you really want to record and stream professional videos for free. Otherwise, you can choose the alternative screen recording softwares of the OBS Studio.


